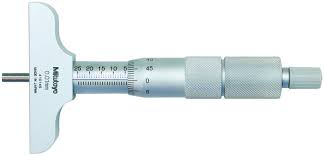
Are you tired of inaccurate measurements costing you time and money on construction projects? In the precision-driven world of hardware and construction export, even minor measurement errors can lead to significant project delays, material waste, and budget overruns. The solution? Mastering the proper use of inside micrometers – the essential tool for measuring internal dimensions with unparalleled accuracy.
Inside micrometers are critical for ensuring components fit perfectly, whether you’re working on structural steel frameworks, piping systems, or mechanical assemblies. However, many professionals make common mistakes that compromise measurement accuracy. This guide will walk you through the top errors and how to avoid them, ensuring your projects meet the highest standards of precision.
Common Mistake #1: Incorrect Zero Setting
Many users fail to properly zero their inside micrometers before use, leading to systematic errors throughout all measurements. Always clean the measuring faces and set the zero point carefully using a setting standard or gauge block. For digital models, ensure the battery is fresh and calibrate according to manufacturer specifications.
Common Mistake #2: Poor Alignment Techniques
Improper alignment is perhaps the most frequent error. The micrometer must be held perfectly perpendicular to the measured surface. Use a rocking motion to find the true minimum reading – when the micrometer feels loose but not wobbly. Practice this technique until it becomes second nature.
Common Mistake #3: Temperature Variations
Metal expands and contracts with temperature changes. Avoid measuring hot components directly after machining or in direct sunlight. Allow parts to reach room temperature, and handle micrometers with clean, dry hands to prevent heat transfer that could affect measurements.
Common Mistake #4: Excessive Measuring Force
Applying too much pressure can distort both the micrometer and the workpiece, leading to false readings. Develop a consistent, gentle touch – most quality micrometers have a friction thimble or ratchet stop to help maintain proper pressure. Listen for the click and stop turning immediately.
Common Mistake #5: Neglecting Regular Calibration
Like all precision instruments, inside micrometers require regular calibration to maintain accuracy. Establish a calibration schedule based on usage frequency and environmental conditions. Document all calibration activities for quality assurance purposes.
How Inside Micrometers Are Made: From Raw Material to Finished Product
Raw Material(s): High-quality tool steel, carbide tips for measuring faces, stainless steel components, and sometimes ceramic for specialized applications. The frames are typically made from forged steel for strength and stability.
Manufacturing Process: The process begins with precision machining of the steel components through CNC turning and milling. Carbide tips are brazed onto the measuring faces for wear resistance. Critical components undergo heat treatment (hardening and tempering) to achieve optimal hardness and dimensional stability. The measuring surfaces are then ground and lapped to mirror finishes with tolerances within microns. Finally, assembly includes careful fitting of all components, with digital models receiving electronic elements and displays.
Key Properties Derived from Manufacturing: The heat treatment process provides exceptional hardness (typically 58-62 HRC) for wear resistance, while precision grinding ensures flatness and parallelism of measuring faces. The careful material selection and manufacturing create instruments with minimal thermal expansion characteristics and excellent corrosion resistance for harsh construction environments.
Quality Control: Each micrometer undergoes rigorous testing including dimensional accuracy verification against master standards, surface finish inspection using profilometers, hardness testing, and functional checks of all moving parts. Digital models receive additional electronic calibration and battery life testing.
Essential Uses in the UAE Construction Landscape
Primary Application(s): In UAE’s booming construction sector, inside micrometers are indispensable for verifying internal diameters of structural steel members, ensuring proper fit of reinforcement bars, checking pipeline internal dimensions for oil and gas projects, and maintaining precision in mechanical systems within high-rise buildings. They’re particularly crucial for the accurate installation of curtain wall systems and precision engineering components in landmark projects like Burj Khalifa and upcoming developments.
Choosing a Reliable Supplier in Dubai: Top Criteria
When selecting an inside micrometer supplier in Dubai, prioritize those offering certified calibration services, comprehensive technical support, and products meeting international standards like ISO 9001. Look for suppliers with proven track records in the construction industry, available spare parts, and warranty support. Reputable suppliers should provide training resources and have knowledgeable staff who understand construction applications.
Trusted Partner for Your Measurement Needs: Lakdawala Trading Co. LLC
For hardware professionals and construction teams across Dubai, Lakdawala Trading Co. LLC has established itself as a trusted partner for quality measurement tools and equipment. Located at Naif Deria, Dubai, they have built their reputation on supplying reliable precision instruments to contractors and builders throughout the region.
What sets Lakdawala Trading apart is their specialized expertise in essential construction tools including Cutting Discs, Measuring Tapes, Hole Saws, Carbide Inserts, and of course, precision measuring instruments like inside micrometers. Their team understands the specific demands of UAE construction projects and provides products that stand up to the region’s challenging conditions.
With their user-friendly website at https://www.lakdawalatrading.com/, professionals can easily browse their extensive inventory and access technical specifications. Their commitment to quality and customer support makes them the go-to supplier for construction teams who cannot afford measurement errors on critical projects.
